Wednesday, October 15, 2008

Hiatus

So you are wondering where I went.
Well as I began to bake for the farmers market I realized to things.
a.) It is very difficult to prepare dough in a basement and then
cart it up a flight of stairs and outside 100 yards to the oven.
b.) The health department is seriously a pain in the butt.

The health department, you see, was ok with me selling bread at the farmers market but nowhere else (and even the farmers market seemed like it was a bit of a struggle)

long story short I need a building around this oven to
a.) make it significantly easier to bake bread. and
b.) make the health department happy.

result:
I have returned to my life of trucking for the winter, possibly longer, in order to make this possible.

Thanks to all the people over the last few weeks who helped to make the farmers market a success.
Keep your eyes out for when the breads return for the summer.

in the mean time check out the trucking blog

Friday, September 26, 2008

A Roof


I put this roof on, just in time since it rained most of yesterday and the forecast is for this to continue which ought to make baking bread and selling it a joy. I will be at the Farmer's Market in Chestertown on Saturday morning at any rate.


Some tools resting in the shade of the new roof.

Tuesday, September 23, 2008

BREAD!

Finally some bread out of this oven!
As you can see, after being properly fired the oven has burnt all of the soot off the walls and ceiling of the oven.
(You might notice that some bricks have fallen from the ceiling, these are the keystones (!) that I made too short) but fortunately i filled the void with concrete which is acting as the keystone. I would be lying if I said this whole thing wasn't taking a few years off my life. Soon when i have a period of time when the oven is not in operation for a while (and thus cool) I will climb in and fill the rest of the void with more high temp concrete.

I made these breads in my basement "workshop" and then carried trays of the baskets (in which they were rising) up and out to the oven. The loaves I made had the same base dough (a 75/25 whole wheat dough) one with soaked mixed grains and one with raisins and walnuts.

In they went, 9 at a time, on the large peel I made, It worked wonderfully. I haven't made tools that are long enough yet to clean out all the way to the back so I put nine in and then 6 more and then two on each side with the small peel that I showed in an earlier post.
Even by the time I got to putting the final loaves in I could see that the first were springing nicely and after about 40 minutes I pulled from the oven these really beautiful loaves.


The Multigrain


The Raisin and Walnut


I don't know if it is brick oven or if it is more the idea of the brick oven but I've never made bread I thought looked nicer than these. and it was delicious. and I suppose that is, of course, because we eat not just food but ideas; and this idea is pretty tasty.

At any rate I took this bread into town and managed to sell it all in a matter of minutes.

Food!

Even while the oven was still drying out I began to put food in it:
Like this pork shoulder which I slow roasted for 6 hours and then shredded and mixed some BBQ sauce made by a friend of the family from North Carolina. As such the sauce was more a highly spiced and sweetened vinegar than what most of america thinks of as a BBQ sauce (spicy ketchup). It was delicious. The color on the pork skin was pretty awesome.

I catered this small dinner party and as part of the first course I served some flatbread that I threw in the oven while there was a fire roaring in it. It was essentially just a pizza dough stretched out into rough ovals. The hot oven puffed it up and browned it beautifully in a matter of minutes (2 or 3 I would say).

Stud Walls and Insulation

In order for the oven to work properly it needs a thick layer of insulation and in order to hold this insulation in the oven needs an exterior wall. It can be built from 4" concrete block but by building a steel stud wall with an exterior sheathing of concrete board (like drywall made of concrete) you end up with an extra 4 inches of insulation.
Steel studs are flimsy things until they all get tied together and sheathed with drywall (or concrete board). They are sort of a bitch to work with. i think I prefer wood although steel studs may be "the future of the industry."

In the front I made a little slot to put the temperature readout meter. I also had to build the face up square in order to meet the steel stud walls flush. I also spent this time corbelling the chimney back and in due time I will mortar on a 8" insulated flue pipe which will take the chimney through the roof of the shed that will cover the oven and the adjacent rooms.

The next step was to fill all that space with vermiculite. Vermiculite is a mineral that, when heated, will expand into little puffy worm shaped rice krispie looking things (worms=verm-). It is used most commonly to condition soils. It loosens up heavy clay soils and retains water in sandy soils. Becuase it is so light weight it also makes a great loose fill insulation and is fireproof and so can get hot where it touches the oven cladding without burning up. At first I though 20 bags would do the trick but I ended up needing 5 more and at $18 a bag this was not so cheap.

So now on to the baking!

Sunday, August 31, 2008

The First Fire


After a few days of gentle space heater heat i figured it was time to up the ante and light some small fires to get things going. Very exciting!
My first thoughts were "it works!" but then again I could also light a fire on the ground.
The chimney (stubby as it may yet be) draws the smoke well provided there is no draft across the front of the chimney (more reason for a building asap).

The Curing Begins


So the curing process takes a while. If you heat up the oven too fast while it is still wet the water can expand explosively and crack the bricks, at least that is what i imagine might happen. For the first 3-4 days I put a little space heater in the oven which warmed up the surface of the bricks and got rid of some of that moisture. In the mean time I set about doing some things that needed to be done.

My dad had been working on a design for the bakery building but we continued to disagree (civilly) and so i decided to design it. It'll be simple, just a building to keep out the weather while I bake bread.

I also have been building some tools to use in the oven. Some of these just consisted of taking short handled tools that I already had and putting long handles on them (usually old shovel handles). but in the case of the peel I made it all from wood I found in the basement.


This peel is for loading bread into the sides of the oven after a larger peel (which I will be making soon) loads bread into the bulk of the oven. They are a bit bulky but sturdy and will no doubt make me strong.

Saturday, August 30, 2008

Arch Cladding

So I had to wait to do this final pour until i could get some help and it seemed to be scarce but eventually i did find some help and managed to pour the top cladding in less than 4 hours. This was the biggest pour yet and was exhausting but then it was done and with it the oven is functionally finished meaning that at this point the dry out procedure begins and the only remaining step is to build a wall around it and fill the void with loose vermiculite as insulation. The oven will work at this point (after curing) just not efficiently. There is of course a lot of "pretty work" to do, unless I want to retain the rustic appeal of concrete block.

The arches covered with foil ready for the pour. The foil breaks the bond between the arches and the cladding so that there is some freedom of movement when heat makes things expand.


The finished arch cladding.

Saturday, August 23, 2008

Outside Arch and Chimney (hood) Beginings


After the wiring I started work on the Outside Arch. This Arch supports the outside wall of the chimney and creates the exterior visual entrance of the oven. pretty awesome. The back wall of the chimney rises from over the doorway to the oven and the sides gradually corbel up (step inwards) until the chimney is at 8"x8" inside dimensions. at that point it will be done until the building is built and then we will add a 8" insulated flue pipe to take it above roof level. A better name for this thing is "hood" rather than 'chimney' since it is outside of the oven and merely provides an escape for the smoke from the fire that isn't the room outside of the arch.

The whole thing is a bit whopperjaw at this point but a.) it is a charmingly amature structure and b.) this can be corrected in successive courses of brick.

Wiring


Even a low tech thing like this brick fire box needs a little 'lectric these days. (look at all those wires.)

There are 6 temperature probes that help to find out how deeply the heat has penetrated the masonry. Three are in the floor and three are in the dome. They are 1" from the surface, 4" from the surface and abour 10" from the surface (or in the brick, between the brick and concrete cladding, and on the outside of the concrete cladding, respectively).
here's the hole in the oven floor through which the wires will be routed.


The view from inside the oven, probably the last time this view will be possible.


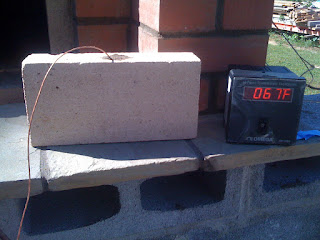
All of these are hooked up to a multiple readout meter that allows me to switch from one reading to another to another. (It's 67 degrees inside that brick!)


The wires are routed through the catacombs underneath the oven for the floor probes and through the (eventual) outer insulation for the dome wires all to the meter which will be mounted to the right of the oven door in a little nook that I will create whenever I get to these decorative (i.e. non-functional) walls.

Tuesday, August 19, 2008

The Arches

Later in the afternoon, after I had returned the cement mixer from the morning's wall pour, I returned with the wet saw ready to begin the arches. I first cut the bricks that would sit atop the walls and meet the bottoms of the arches and then mortared them into place. While the mortar cured I set about the precise details of constructing the wooden arch form, an arc of plywood that would support the bricks while they were being laid.
That done I attempted my first arch but quickly found the mortar would not be nearly strong enough on its own to support the tapping and pounding necessary to get arch bricks into proper alignment. What I should have done was to mortar the beveled top bricks to the top of the wall when I built the wall and then pour the wall concrete so that it would come up to the bottom of these bricks and catch the outward thrust.
By this point I was tired and frustrated and gave up for the day but just then a friend scott called saying he was willing to come by and give me a hand for and hour or so before dinner and so, when he arrived, We mixed a bit of concrete and poured it around the top of the walls, increasing their height by a few inches and securing the top beveled wall bricks from sliding backward.

The next morning I awoke and in the freshness of my mind realized what I had been doing wrong, acknowledged that I had fixed it, and set about the project again with renewed zeal and before long I had my first arch (it was also my birthday). In the photo you can see the first arch with the arch form, having been removed, sitting atop it.

I carried on and by lunch I had completed most of the arches and after lunch finished the last of them and closed in the dome. The closing in on the corners got a little messy but, since my oven was slightly larger than the plans I had only a few whole bricks left and many offcuts and made do with what I had, the result being thoroughly satisfactory and vaguely cubist.

I returned the wetsaw, a little late, and enjoyed the rest of the day. It was cool dry and breezy (a lovely birthday gift for anyone born in early august) and later had some friends over for a small party a key feature of which was regarding the oven which now most certainly resembled a chamber in which one might someday (soon) bake things.

The next day it was off to Minnesota to cater the wedding of a friend's sister and so the concrete cladding atop the oven would have to wait til my return, just as well since I had not yet received the temperature probes that I would need to embed in the cladding to monitor the heating of my masonry behemoth.

Pictures:
The arches are complete and the row of bricks set against the doorway rises to meet them.


The inside of the closed in front right corner, Braque- esque, if you will.


The interior of the completed chamber.


The oven at the end of a long week.

The Concrete Walls


I was wishing that I could find some help for some of this concrete work but seeing as most people I know seem to have "jobs" they are not ready available in the steam of a Delmarva morning to mix and pour concrete.

I headed to the hardware store and picked up three 5 gallon buckets and rented the concrete mixer for the 2nd and not final time and then spent the morning shoveling gravel, sand and cement into the mixer (6,4,and 2 shovels respectively) and then dumping the mix into the buckets, then lifting the buckets onto the lip of the oven, then climbing up into the oven, and then lifting the buckets oven the forms and into the oven and dumping them into the void between the brick walls and the OSB forms set up to hold the concrete. After three hours and at least 8 batches of concrete I was finished and thoroughly disgustingly sweaty and gritty. But now I had walls and the next step would be to build the formidable arches.

Wednesday, August 6, 2008

Forms

Today didn't feel very productive mostly because I spent a long time trying to drill through concrete. I set up the rebar that will reinforce the walls and drilled the holes for the temperature probe wires. (That is why in some pictures you will notice a brick missing from the floor (i am still waiting for the wires via post)).
Then I built the forms that will hold the concrete for the walls. I also built the form for building the arches but I can't build the arches until the walls are poured and to do that I am gonna need some help.

Walls


And up go the walls!
I built the side walls first.


and then built up the back wall to meet the arched ceiling and built up the entryway.


When I went to take pictures apparently I woke the cat who must be under the impression that i am building him the most lavish lounging spot on earth.

Bricks


A friend of mine from NYC, eager to come and help with the oven before it was completed, came down this weekend. What she got, it seems, was the unenviable task of loading and unloading bricks.
You see I ordered the bricks last Monday and was told that they would be in on Wednesday or Thursday. When I called on Thursday afternoon I was told "oh they'll be in the first of the week." No explanation or apology. So the bricks didn't come until this Monday and Maddie was down for Sunday and Monday and so we spent Monday loading and unloading bricks. The old truck I have is weak in the springs and carting back 150 red bricks and 535 firebricks and a quarter ton of sand (like 2 and half tons) took 4 trips.
We did manage to get the floor of the oven down and it was exciting to finally see a part of the oven that would not be hidden by another part. Indeed the surface upon which the bread will cook!

Sunday, July 27, 2008

The Hearth Slab


So, like I said in the last post think of the oven as a chamber made of brick wrapped in a layer of thick concrete wrapped in a layer of insulation. The brick and concrete layers are what hold the heat from the fire and then radiate it back into the chamber for the bread baking.
The hearth slab is the bottom of this concrete layer and the platform on which the oven itself is built. It is made from a concrete made of the high temp "ciment fondu" mixed with sand and 1/4" crushed rock to make a high temp concrete. It is reinforced and in fact, held up by a grid of 5/8" re-bar. The slab does not extend all the way to the walls but "floats" suspended by the re-bar supported on the outer foundation walls. This construction allows for the oven to expand when heated without cracking the foundation walls.
We built forms from 1x6 lumber that had slots cut out so that it would fit over the re-bar. Here Sarah is cutting out the slots.


Here's the form in place ready for the pour.


We rented a small concrete mixer although I could have used a big one. We would mix up a batch, dump it into a mortar pan and then heave it up and tip the mortar pan into the form, over and over again. It was exhausting.

The next day after the forms were removed I filled the gap with the vermiculite/ cement mixture to prevent junk from falling into it in the meantime.

Insulation Layer

I was eager to get going now that I finally was in possession of the cement.
The oven can be thought of as a brick chamber surrounded by a thick layer of high temperature concrete and a blanket of lightweight insulation.
The insulation consists primarily of vermiculite. Vermiculite is a mineral that when heated up expands into puffy worm like (thus the "verm-") particles, sort of like rice krispies. It is also used as a soil additive to loosen up clay soils or retain water in sandy ones. Once the oven is complete loose vermiculite is poured over the oven as a loose fill insulation. Beneath the oven it has to adhere to itself and the bottom of the oven and so is mixed with a bit of portland cement (the primary binder in concrete) and poured onto the forms that carrie helped me make last time i did any real work on the oven.
Before the vermiculite is poured 6x6 mesh is put down with some of the struts bent up. The mesh will help to hold the vermiculite layer up. The bent struts will hold fast into the concrete layer above it.
Once the mesh is in place the vermiculite cement layer is poured wall to wall to a depth of about 3 inches.
Sarah (my sister) regards the pour of the first batch of vermiculite as we both realize that this is going to take a while.

Cement!


Finally, the Calcium Aluminate Cement!
On my way back from finishing my trucking job I stopped by Kerneos in Chesapeake Virginia, importer of Ciment Fondu, a high temp calcium aluminate cement that will make up the bulk of the "thermal mass' of this retained heat oven.
I trucked it up the Delmarva and up the driveway. Finally!