Thursday, August 18, 2011

All moved in.

Immediately after the final building inspection on tuesday morning a visiting friend and I moved all the equipment which had been living in the basement of my parents house, into the bakery. It certainly is more full now. Feels almost cozy and certainly, and finally useful for making the bread.
a couple pictures (and a movie!):


Tuesday, August 16, 2011

Trimming up outside

And the mostly finishing touches on the outside.
There are a few things that I would like to add but they are not required for the building inspection
and I am flat broke and need to get rolling with this whole bread business side of the project.
So, some final outside pix and then on to inspections and licenses and insurance and then
finally, some bread.

The Front


The Back


The Porch (with trash cans)


Insulation, Drywall and Painting.

I did not take any pictures of the insulation and drywall aspects of this project.
Perhaps this is because these processes are truly miserable.
I managed to come to the insulation phase of this project on what was one of the hottest, most humid days of the year.
Given the itchy unpleasantness of insulation I also wore long sleeves and pants and by the afternoon nearly passed out.
But fear not, all was fine and I finished up the next day and proceeded with the drywall.
Drywall is another miserable task beginning with the hoisting of large heavy panels that break or mar easily
and is followed with the unpleasant task of applying joint compound, sanding and repeating
and repeating.
hot and dusty and disgusting.
at any rate, when it is all done it is time to paint!
So here are those pictures:

The Kitchen. Replete with three-compartment sink.


The Oven, with blue bathroom visible to the left.
Those great tables (and the 3-compartment sink) came from an on line auction
of the equipment from a closed SuperFresh store in Rosedale, MD)


Balcony Rail (will keep me from falling out of the office.)

Siding. (and windows).

For the long absence, I apologize.
there are many excuses, not the least of which is I have been busy building.
but perhaps more legitimately I have no patience with the slowness of the internet in these parts.
At any rate some pictures.
In this installment siding and windows!


House wrap, like Christo, but for a reason.


Siding. (and windows).


And in Blue!


Friday, May 20, 2011

A Roof


Finally I have a dry space in which to work. My dad helped me by holding these panels in place while I scrambled up the ladder to secure the tops all around. Then I began to put all the rest of the fasteners but before I could get around to the front a delightful 15 minute thunderstorm whooped up and tore the front panel off the side I had yet to fully fasten. It made a sound like a crack of thunder which is what I thought it was at first. at any rate, if you see some dirt on that front panel, that's why. It ought to wash off with the next rain, which, with the way things have been going of late in Maryland, shouldn't be too long.


A view from the new roof of the incoming storm.

Wednesday, May 18, 2011

Sheathing


Sheathing is the proces of applying sheets of plywood (or OSB in this case) to the outside walls and roof of a structure. Sheathing doesn't protect a structure from the elements. This is the job of siding and roofing. Sheathing gives the structure strength by tying all of the framing members together. Before the Sheathing was installed when I stood on the loft of the building the whole thing swayed slightly. With the sheathing installed the whole thing is "solid as a rock."


Up next: Siding, Roofing, Windows and Doors!

Wednesday, May 4, 2011

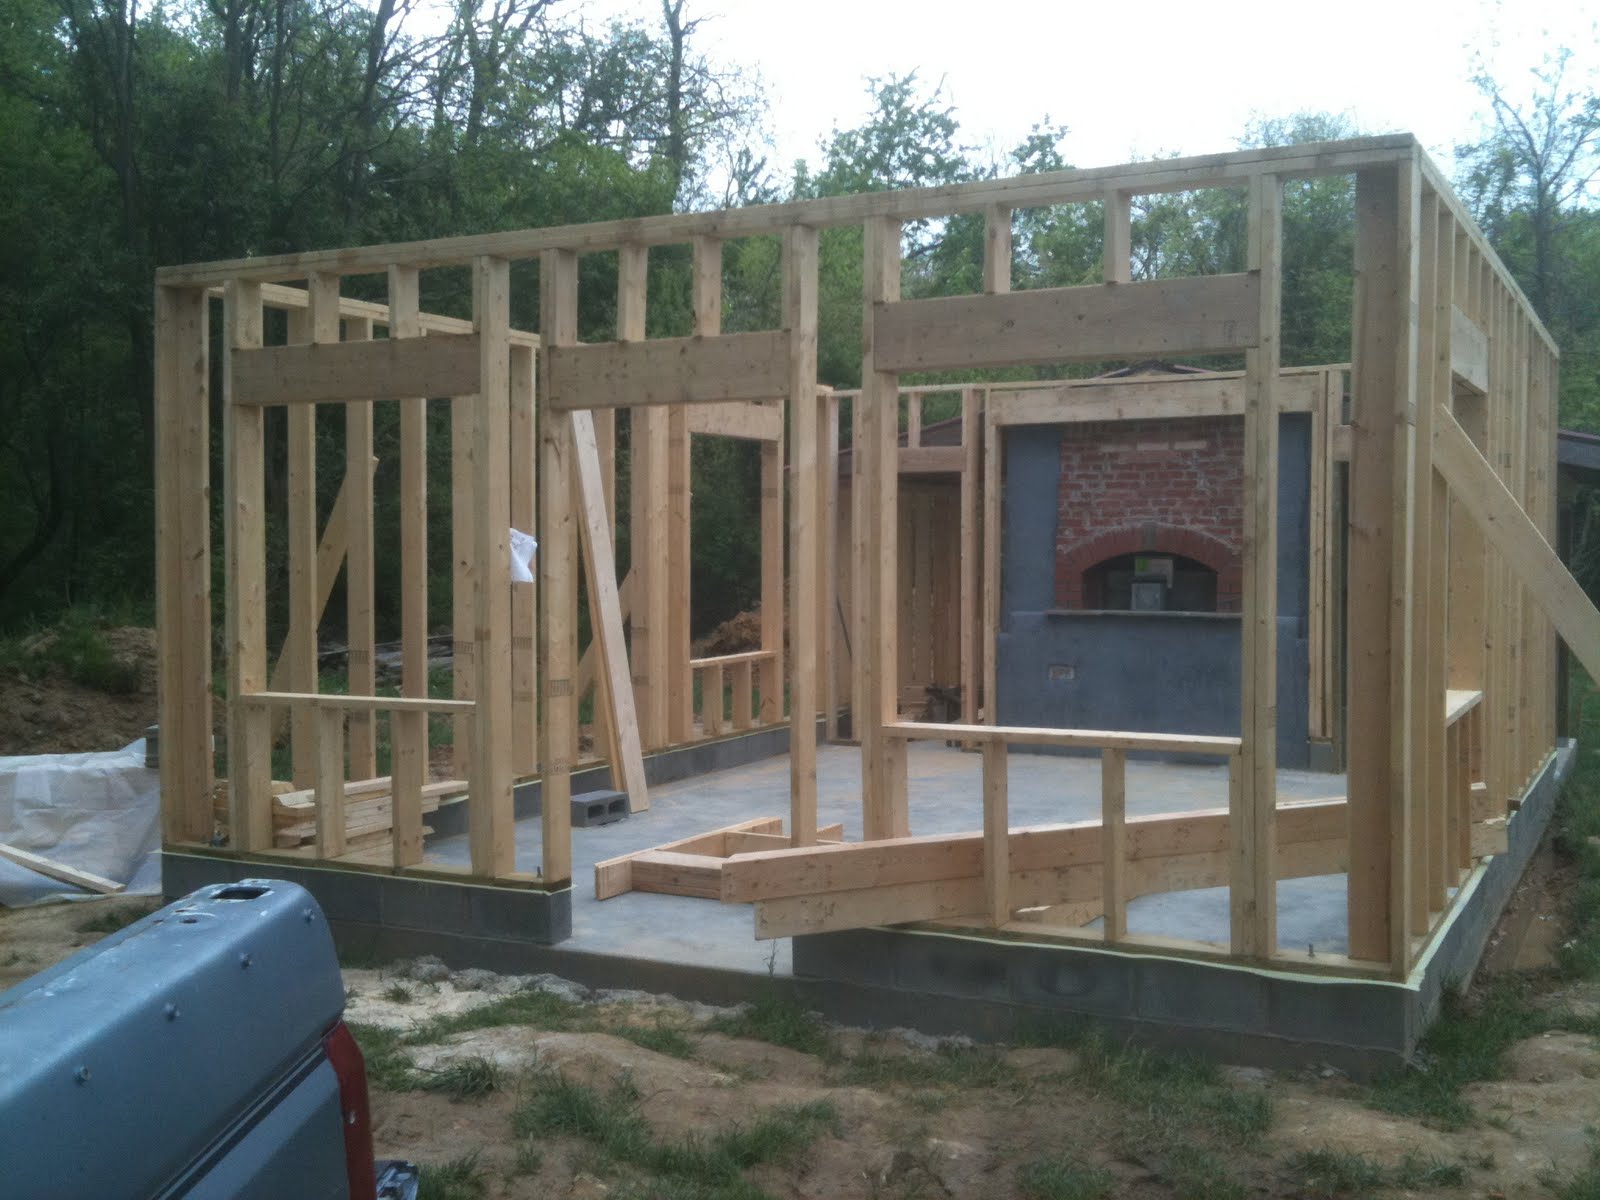
Framing


Lots of wood, stacked neatly into pretty repetitive piles and the building has become, as my mom says, "real."


Tuesday, April 19, 2011

Concrete Block


The first move vertically is this: a single course of concrete block. Humble, homely, but sturdy and ready to be framed upon.

Thursday, April 14, 2011

Plumbing and Concrete


After the septic was installed and the trenches dug I set about trying my hand at the plumbing. Though i did a job that was apparently "not half bad," not half bad is also not half good as far as the building inspector is concerned and the plumbing was (slightly) reworked by E.T. Kimble et fils of Sudlersville, MD.
That having been completed I prepared the site for concrete by putting down a layer of stone covered in plastic covered in wire mesh. The stone allows moisture an easy path away from the slab and the plastic prevents water vapor from migrating through the slab. This is more of a concern in a finished basement setting where carpet etc. would get moldy although, no one wants moldy bread so i may as well do this right.
I also had to build a form which was a bitch and six halves, primarily because i built it and then it rained and rained again, each time making the ground softer and each time upsetting the delicate balance. then the plumbers came and completely fucked the whole thing up with no delicacy whatsoever.

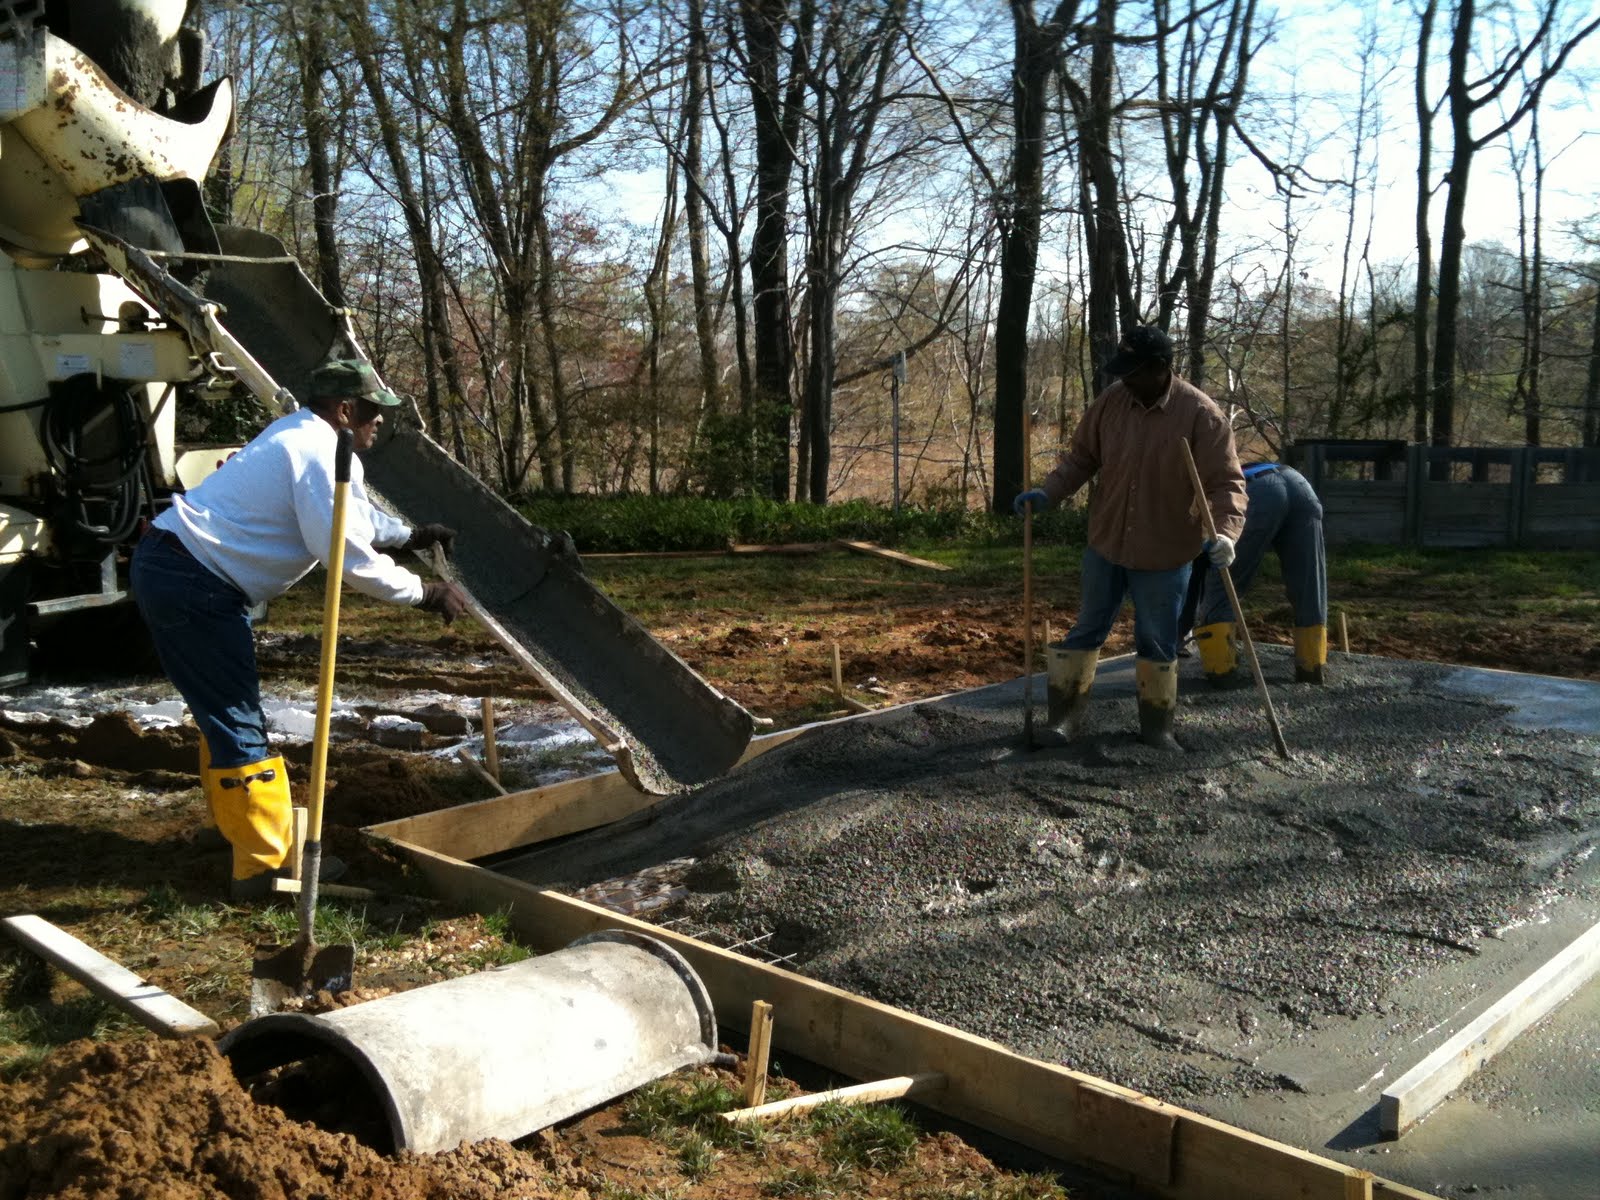
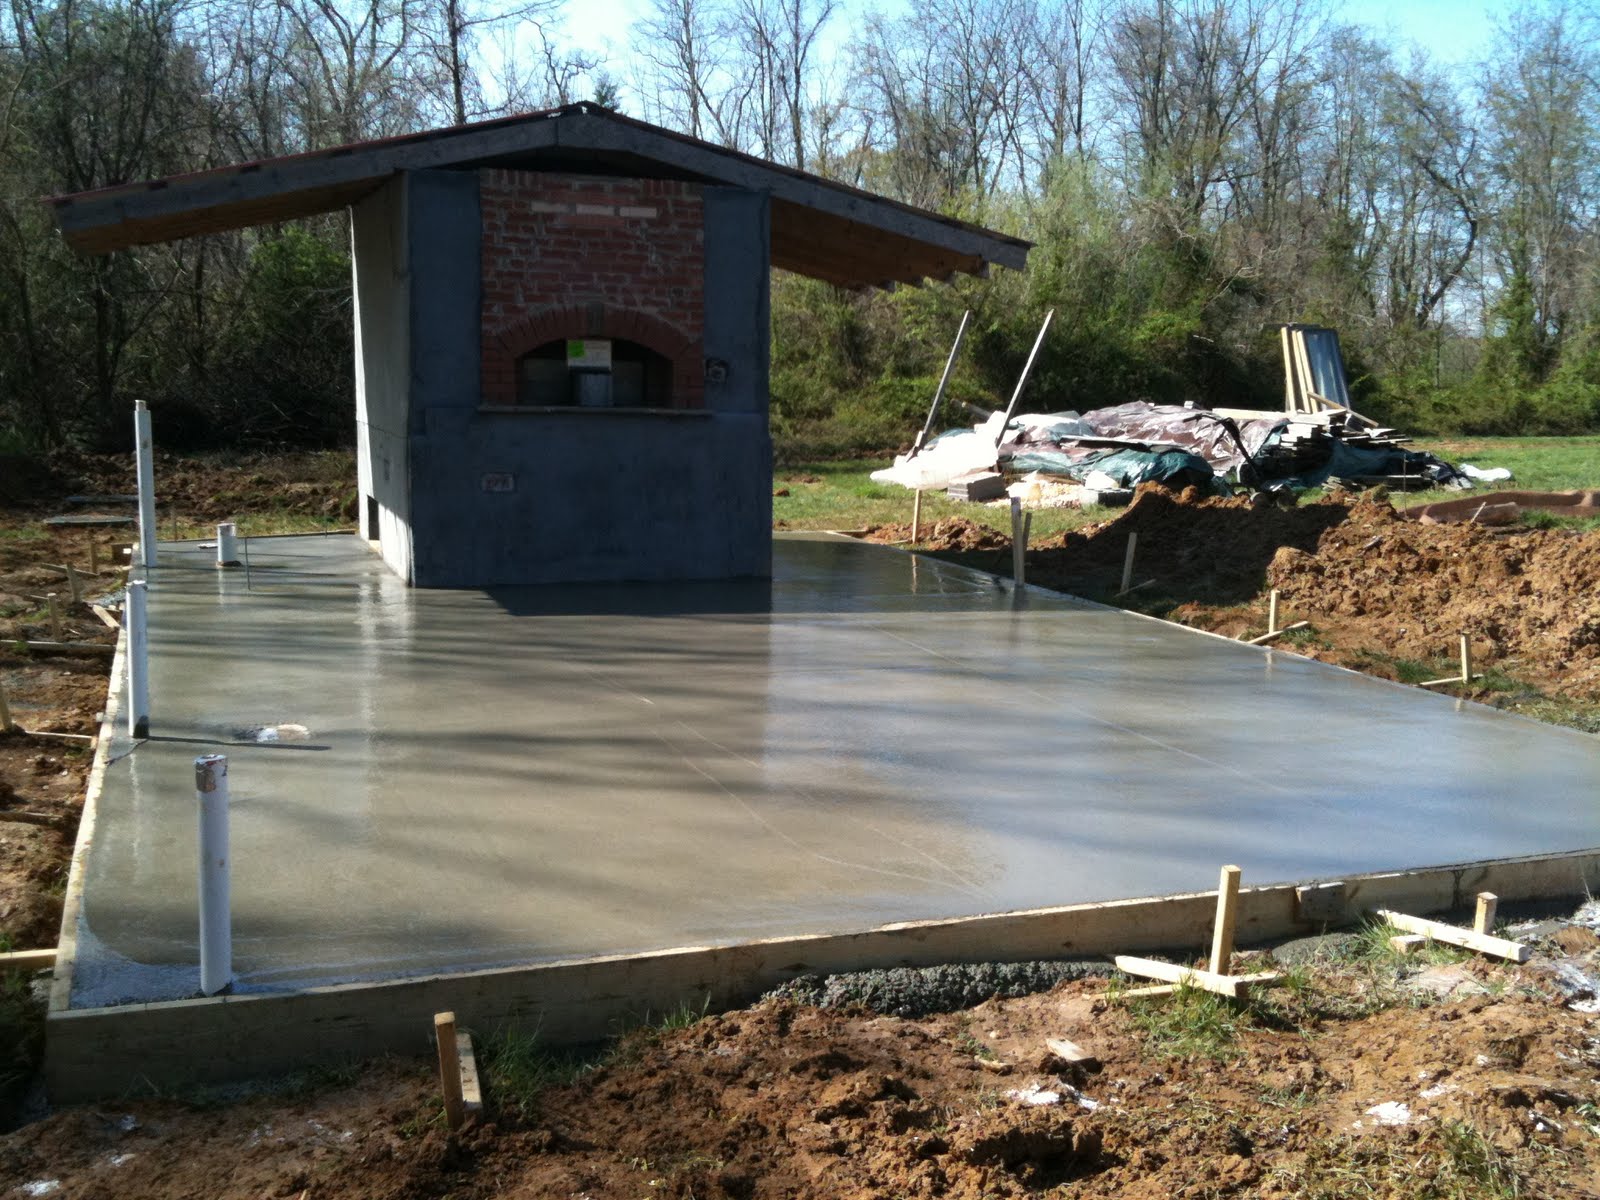
But finally, after much purgatory, i emerged to today, a beautiful sunny day on which Gillespie and Son, Inc. brought some concrete and Edwin Wright and his son Ebby (and some guy named Gene) finished it to a wonderful smooth finish.
Finally, this project has risen up out of the mud and it is starting to look like a building and starting to make me feel great!
(I have also had a few drinks this evening.)
shiny new concrete.

Thursday, March 31, 2011

Septic System

The septic permit issued after the perc test was done required a 1500 gallon two compartment tank (this is a larger tank than the one for my parents' 3 bathroom house) equipped with a pump which would pump the effluent up to the existing distribution box.

For those unfamiliar with Septic Systems a brief primer.
A Septic System consists of three parts: a tank, a distribution box and a drain field. Effluent from the house (bath water, laundry soap, poopy, etc...) enters the septic tank. in the tank solids settle to the bottom and liquid rises to the top where there is an outlet. The outlet drains via gravity to the distribution box (or D-Box (different than a D-Bag) in the parlance of the trade). The distribution box splits the one input into multiple outputs that lead to the drain field. The drain field is an array of perforated pipes laid on gravel at the permeable layer (that part of the subsoil that water can easily travel through. The liquid effluent (having been separated from its solids) flows through the drain field and gradually seeps into the ground where it is continuously filtered by dirt and other particulates until it reaches ground water. The septic system doesn't so much keep you from dumping sewage into water as much as slows it down considerably.

The system being installed for the bakery differs from this model in two ways. A. it has a two compartment tank (most septic tanks do) this allows for "double separation" and keeps more "shit" (solids) out of the drain field. B. It has a pump. This is because the current D-Box is uphill from where the bakery is located. Typically these things are all gravity fed.

The work is being done by Raymond Harrison and Sons Septic Contractors. The excavator is being operated by a very talented guy named Andrew. It's nice to see someone so good at something you had never considered being good at before. So tuesday the tank was put in, yesterday they laid most of the line to the D-Box and today they finished the line and began work on the inlet side of the box. While they are here they are also excavating the slab and footers for the concrete foundation of the bakery building.
What fun! What a mess!
The trench with pipe being laid in it. (the tank's top is visible in the foreground, Andrew is visible in the middle distance, in the trench)


Backhoe and Oven, together at last.

Stucco: Finish Coat


I chose Charcoal as the color for the finish coat. And when applied I thought it looked grand, a nice rich dark grey, but, alas, all good things must come to an end and as the stucco dried the color ended up lighter. It still looks good but it is sort of like a slightly darker, bluer shade of portland cement. oh well, it still looks pretty snappy.

Monday, March 14, 2011

Stucco

Given that I have had some delays with the health department (which I will tell you all about in due time) I needed an outlet for my building enthusiasm and figured it was long past time to finish the exterior of the oven. When last we left the oven it had been surrounded by a steel stud wall and sheathed in concrete backer board. This was functional but pretty hideous and so something had to be done. Given the enormous amount of cement already in this 70 sq.ft. I thought a little more wouldn't hurt and so I decided to finish the oven with stucco which is essentially the same as mortar.
Stucco goes on in two (or three coats) and given that I couldn't find any info on the pros or cons of one or the other I decided to go for the 2 coat. The first coat is called the scratch coat because once it is partially cured you scratch it to ensure good adhesion with the second coat.
The concrete backer board had to be covered with wire lath, a miserably sharp product that helps the stucco adhere to smooth surfaces. I did not cover the concrete block with wire lath, although some do, and at times I wished I had because the concrete block did not grab the wet stucco with much ease. Now that it's up though I am fairly confident that it is not going anywhere anytime soon. Enough talking:
Some rounding of corners on the front of the oven done with left over stucco


Stucco around the back


Wire Lath on the front corner of the oven

Wednesday, February 16, 2011

Perc Test

Perc Test is short for Percolation Test, a test of how well (or poorly) water percolates through the soil. Typically this consists of digging a hole to the permeable layer (sandy or gravelly layer) and filing it with water and seeing how quickly it drains. This test was important because it would determine if the existing septic system at this residential property was adequate to serve the bakery as well, or if we would have to upgrade the system. Because the property is in the "critical areas" (within 1000 feet of tidal waters of the Chesapeake Bay) if improvements were required it would have necessitated an upgrade to a nitrogen reducing septic system, a very expensive proposition that would have made the bakery project impossible at the current time.

Well, out came the backhoe and the Health Department today to see what was necessary. The backhoe dug down as deep as it could (about 17 feet) where the heavy clay soil of this part of the eastern shore becomes sandier. The Health Department didn't need (or want) to put water in the pit. They just had a look at the soil, thought a bit, and decided that augmentation of the current system was unnecessary. Hallelujah.
What will be necessary is to install a 1500G two compartment tank near the bakery which will be outfitted with a pump that will pump the effluent up to the existing drain field. Not cheap, but not impossible.

In further health department news here is a picture of the Food Service Plan Review Application. Yes sir, that binder full of bs is just an application. Not pictured is the check for the $350 plan review fee. I do love a good bureaucracy.


Up next!: we put in a septic system! excavate a slab! and build a bakery!

Friday, January 28, 2011

Oh Yes, i am building this bakery.

So apparently the "perhaps longer" to which i referred in the last post meant over 2 years. But fear not, I am back, and the loan for the building of the building has just been approved! I suppose this means the economic downturn is over. And now it's time to give the local economy/government a boost with some much needed and seemingly endless permit fees. stay tuned!

Wednesday, October 15, 2008

Hiatus

So you are wondering where I went.
Well as I began to bake for the farmers market I realized to things.
a.) It is very difficult to prepare dough in a basement and then
cart it up a flight of stairs and outside 100 yards to the oven.
b.) The health department is seriously a pain in the butt.

The health department, you see, was ok with me selling bread at the farmers market but nowhere else (and even the farmers market seemed like it was a bit of a struggle)

long story short I need a building around this oven to
a.) make it significantly easier to bake bread. and
b.) make the health department happy.

result:
I have returned to my life of trucking for the winter, possibly longer, in order to make this possible.

Thanks to all the people over the last few weeks who helped to make the farmers market a success.
Keep your eyes out for when the breads return for the summer.

in the mean time check out the trucking blog

Friday, September 26, 2008

A Roof


I put this roof on, just in time since it rained most of yesterday and the forecast is for this to continue which ought to make baking bread and selling it a joy. I will be at the Farmer's Market in Chestertown on Saturday morning at any rate.


Some tools resting in the shade of the new roof.

Tuesday, September 23, 2008

BREAD!

Finally some bread out of this oven!
As you can see, after being properly fired the oven has burnt all of the soot off the walls and ceiling of the oven.
(You might notice that some bricks have fallen from the ceiling, these are the keystones (!) that I made too short) but fortunately i filled the void with concrete which is acting as the keystone. I would be lying if I said this whole thing wasn't taking a few years off my life. Soon when i have a period of time when the oven is not in operation for a while (and thus cool) I will climb in and fill the rest of the void with more high temp concrete.

I made these breads in my basement "workshop" and then carried trays of the baskets (in which they were rising) up and out to the oven. The loaves I made had the same base dough (a 75/25 whole wheat dough) one with soaked mixed grains and one with raisins and walnuts.

In they went, 9 at a time, on the large peel I made, It worked wonderfully. I haven't made tools that are long enough yet to clean out all the way to the back so I put nine in and then 6 more and then two on each side with the small peel that I showed in an earlier post.
Even by the time I got to putting the final loaves in I could see that the first were springing nicely and after about 40 minutes I pulled from the oven these really beautiful loaves.


The Multigrain


The Raisin and Walnut


I don't know if it is brick oven or if it is more the idea of the brick oven but I've never made bread I thought looked nicer than these. and it was delicious. and I suppose that is, of course, because we eat not just food but ideas; and this idea is pretty tasty.

At any rate I took this bread into town and managed to sell it all in a matter of minutes.

Food!

Even while the oven was still drying out I began to put food in it:
Like this pork shoulder which I slow roasted for 6 hours and then shredded and mixed some BBQ sauce made by a friend of the family from North Carolina. As such the sauce was more a highly spiced and sweetened vinegar than what most of america thinks of as a BBQ sauce (spicy ketchup). It was delicious. The color on the pork skin was pretty awesome.

I catered this small dinner party and as part of the first course I served some flatbread that I threw in the oven while there was a fire roaring in it. It was essentially just a pizza dough stretched out into rough ovals. The hot oven puffed it up and browned it beautifully in a matter of minutes (2 or 3 I would say).

Stud Walls and Insulation

In order for the oven to work properly it needs a thick layer of insulation and in order to hold this insulation in the oven needs an exterior wall. It can be built from 4" concrete block but by building a steel stud wall with an exterior sheathing of concrete board (like drywall made of concrete) you end up with an extra 4 inches of insulation.
Steel studs are flimsy things until they all get tied together and sheathed with drywall (or concrete board). They are sort of a bitch to work with. i think I prefer wood although steel studs may be "the future of the industry."

In the front I made a little slot to put the temperature readout meter. I also had to build the face up square in order to meet the steel stud walls flush. I also spent this time corbelling the chimney back and in due time I will mortar on a 8" insulated flue pipe which will take the chimney through the roof of the shed that will cover the oven and the adjacent rooms.

The next step was to fill all that space with vermiculite. Vermiculite is a mineral that, when heated, will expand into little puffy worm shaped rice krispie looking things (worms=verm-). It is used most commonly to condition soils. It loosens up heavy clay soils and retains water in sandy soils. Becuase it is so light weight it also makes a great loose fill insulation and is fireproof and so can get hot where it touches the oven cladding without burning up. At first I though 20 bags would do the trick but I ended up needing 5 more and at $18 a bag this was not so cheap.

So now on to the baking!

Sunday, August 31, 2008

The First Fire


After a few days of gentle space heater heat i figured it was time to up the ante and light some small fires to get things going. Very exciting!
My first thoughts were "it works!" but then again I could also light a fire on the ground.
The chimney (stubby as it may yet be) draws the smoke well provided there is no draft across the front of the chimney (more reason for a building asap).